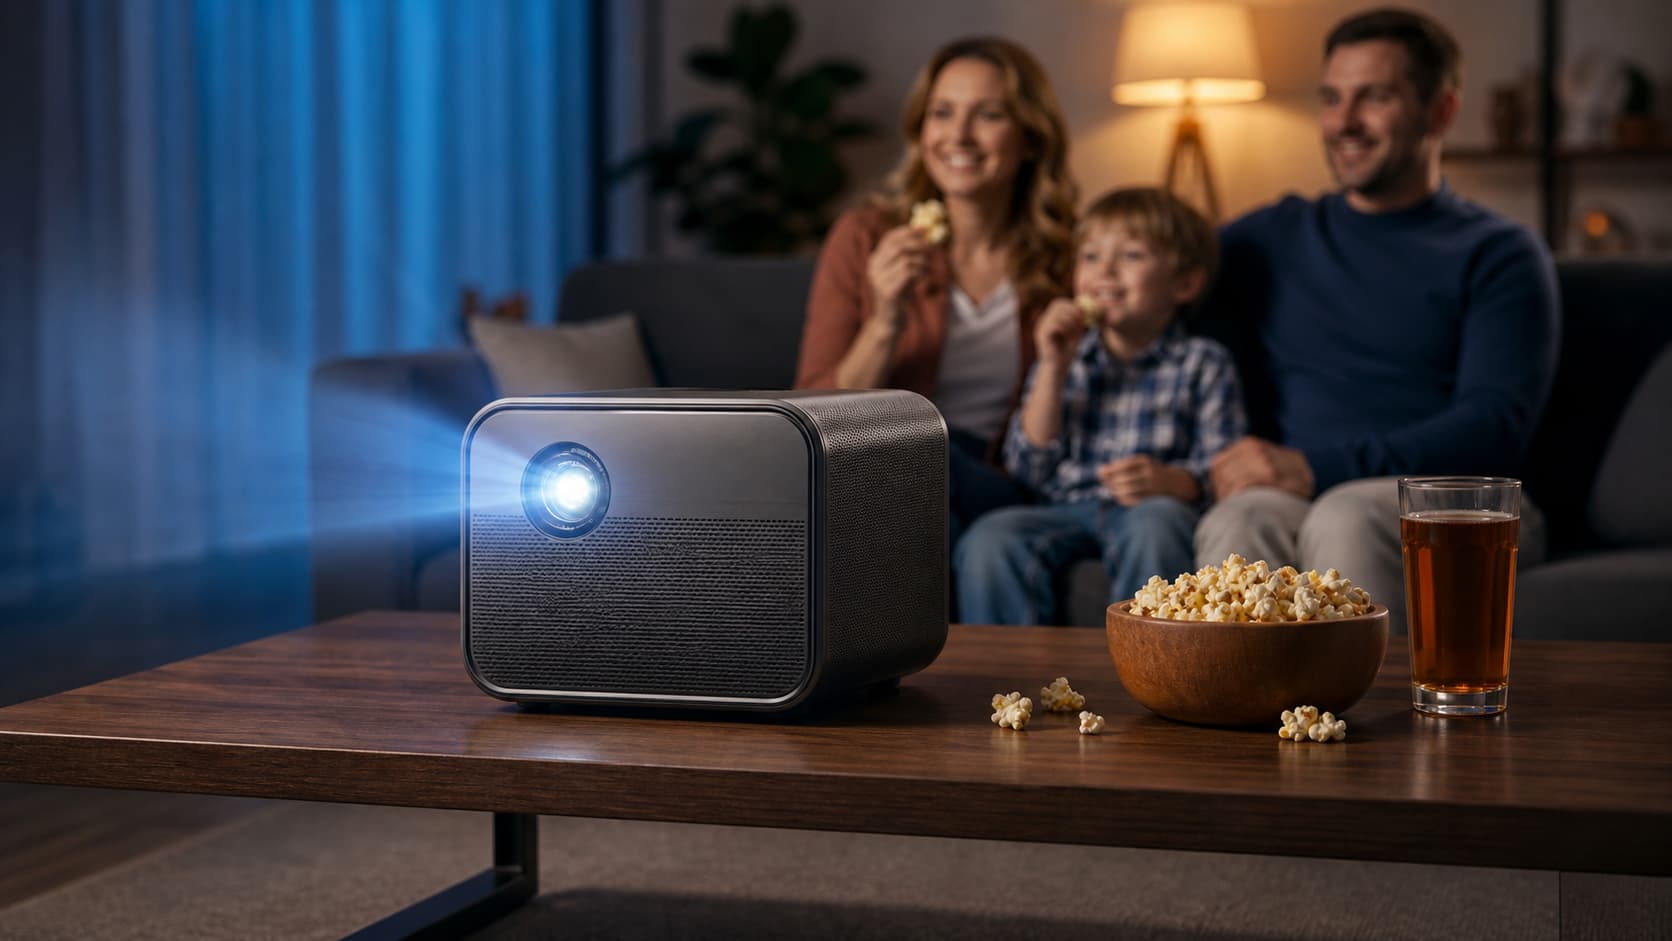
Sourcing a projector in China is easy. Building a stable product line for the U.S. market is the part that usually takes longer than buyers expect.
The first sample may look good in a meeting room: sharp image, reasonable price, fast replies from the supplier. But the questions that matter tend to arrive later. Does the same unit remain quiet after two hours of use? Does the image stay focused when the optical system is warm? Is the firmware stable on the routers, streaming devices, and HDMI sources customers actually use? If a component becomes unavailable, who decides what can change?
Those questions are why choosing among DLP projector OEM manufacturers in China should not be treated as a simple comparison of resolution, brightness, and MOQ. The buyer is choosing a manufacturing system: the people who control the optical platform, firmware, production configuration, testing, documentation, and support after shipment.
This guide is for U.S. brands, distributors, AV partners, and private-label buyers evaluating a DLP projector factory in China. It focuses on the parts of the process that become important once a project moves beyond the first sample.
The Cost Hidden Inside the Lowest Quote
Two suppliers can quote what appears to be the same 1080p or 4K projector and still be offering very different products.
One may be quoting a mature standard platform with little room for engineering changes. That can be suitable for a small private-label projector launch, especially when speed matters more than differentiation. Another may be quoting a project with a defined product configuration, version-controlled firmware, a production-intent sample, a documented quality plan, and a clearer path for support after launch.
The lower quote is not automatically the wrong choice. It becomes risky when nobody can explain what happens after the sample is approved.
A buyer should be able to understand which parts are fixed, which parts may change, what software version will ship, what happens if a wireless module or power adapter changes, and who is responsible for solving a problem found after the first order. If the answer is only “no problem,” the project is not yet defined well enough.
Before requesting quotations, state the commercial reality of the product: intended sales channel, retail price range, target user, planned annual volume, smart-platform requirements, and launch window. A private-label portable projector, a retail smart projector, and a home-entertainment model for AV dealers may share a DLP platform, but they should not be developed or tested in exactly the same way.
Why Many Projector Programs Use DLP
DLP is widely used in portable, smart, home-entertainment, laser, ultra-short-throw, and professional projection products. At the center of a DLP system is a Digital Micromirror Device (DMD), which works with controller and power-management components to modulate light and form an image. Texas Instruments’ DLP technology overview explains the broader projection platform and its system components.ti
For an OEM buyer, the DMD is only the beginning. The finished projector is shaped by the light source, optical engine, lens, airflow path, mainboard, power system, firmware, image processing, and mechanical calibration.
This is where buyers sometimes get the wrong impression. A supplier can correctly say that a projector uses TI DLP technology, but that statement does not answer whether the projector will hold focus at a large image size, remain acceptable acoustically in a living room, or behave reliably after extended playback. Those are system-level questions.
A DLP platform may be a good fit when a product needs a compact optical architecture, responsive image handling, or a more differentiated position above the entry-level category. It is not a substitute for careful optical, thermal, firmware, and quality engineering.
What “4K” Means in a DLP Projector
Many consumer DLP projectors use pixel shifting rather than a native 4K DMD array. TI XPR technology rapidly displays and spatially shifts multiple subframes to produce a 3840 × 2160 image with 8.3 million pixels on screen. Texas Instruments’ XPR 4K overview describes this 4K UHD implementation.ti
That is a valid technical approach, but it does not mean every 4K projector will perform the same way. The DMD, controller platform, supported input formats, image processing, optical design, and whether digital keystone is active can all affect the final result.
When comparing a 4K DLP proposal, ask the factory to identify the DMD platform, supported input resolution and refresh-rate range, image-processing limits, and expected behavior in the picture modes intended for customers. A 4K specification without that context is mostly a marketing label.
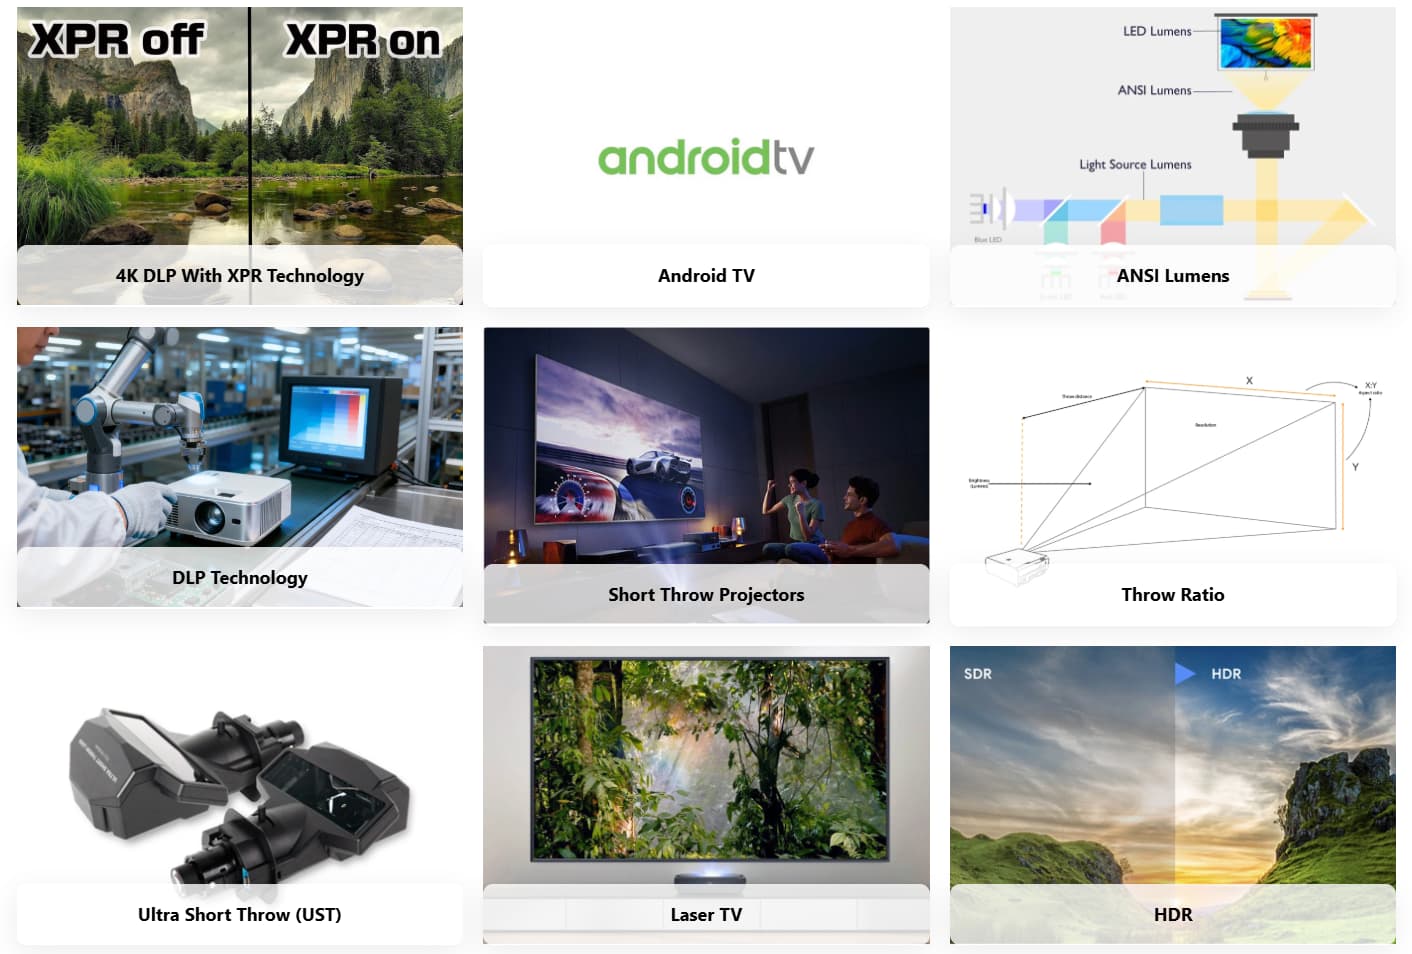
DLP and LCD Are Business Choices
DLP and single-panel LCD should not be framed as a simple better-versus-worse decision. Both are used in the projector market, and both can be executed well or poorly.
The more useful question is whether the proposed platform suits the retail price, product position, expected service life, and warranty model you intend to support.
| Consideration | Single-panel LCD programs | DLP programs |
|---|---|---|
| Typical price positioning | Often used in cost-sensitive, entry-level product lines | Used across portable, smart, home-entertainment, premium, and professional products |
| Product size | Cooling and optical layout may require a larger enclosure | Can support compact optical architectures, depending on brightness and thermal targets |
| Motion rendering | Depends on panel response, image processing, and implementation | Often selected for fast mirror response and crisp motion rendering |
| Dust management | Optical sealing varies by manufacturer and design | Optical-engine sealing also varies; buyers should verify the actual construction |
| Color performance | Depends on light source, panels, optics, processing, and calibration | Depends on illumination architecture, optics, processing, and calibration |
| Engineering focus | Cost control, optical-path protection, panel consistency, and heat management | Optical alignment, illumination design, controller integration, thermals, and firmware |
Recommended internal link: Link the phrase DLP vs LCD projector technology to a dedicated comparison article, such as:
What OEM and ODM Mean After the Quote
Private label, OEM customization, and ODM development are often presented as simple sourcing labels. In a real projector project, they describe how much of the product is already fixed and how much responsibility the buyer and factory share.
| Model | What the buyer controls | What the factory controls | Typical use |
|---|---|---|---|
| Private label | Brand, packaging, and limited configuration choices | Existing platform, core hardware, and production process | Testing a category or launching a standard product quickly |
| OEM customization | Product brief, selected features, configuration, and brand direction | Manufacturing, agreed engineering changes, and quality execution | Brands and distributors with defined product requirements |
| ODM development | Market brief, commercial targets, user experience, and differentiation goals | Product development, engineering integration, tooling, and production | Buyers seeking a more distinctive product without an internal hardware team |
| Full custom development | Detailed roadmap, investment plan, and technical requirements | Hardware, optical, structural, software, validation, and manufacturing | Higher-volume programs with a long-term product strategy |
The label itself matters less than the agreement behind it.
If a buyer pays for a new housing, custom firmware, different optical configuration, or special accessory set, the contract should answer practical questions. Who owns the tooling? Can the factory sell a similar design to another customer? Who controls the firmware branch? What happens when the buyer needs an update after launch? Is a future revision included in the project, or treated as new development work?
Those details are not legal fine print. They determine whether the buyer is building a product line or simply buying a shipment.
Factory, Design House, and Trading Company
A trading company is not automatically the wrong partner. It can add value through product sourcing, export coordination, consolidation, and mixed-SKU purchasing. For a small order or broad catalog requirement, that may be useful.
The important question is whether the buyer has transparent access to the people behind the proposed projector. When a project depends on software changes, optical tuning, long-term component availability, or production validation, buyers need to know who owns those decisions.
Instead of asking whether a supplier has every process in one building, ask which parts of the program are controlled directly and which are handled by qualified partners. For a DLP projector project, the useful areas to clarify are optical integration, final assembly, calibration, firmware ownership, incoming inspection, reliability validation, and final quality control.
A serious supplier should be able to explain how the approved sample becomes the production version. That includes the firmware build, main components, power adapter, accessory set, packaging, test method, and change-control process.
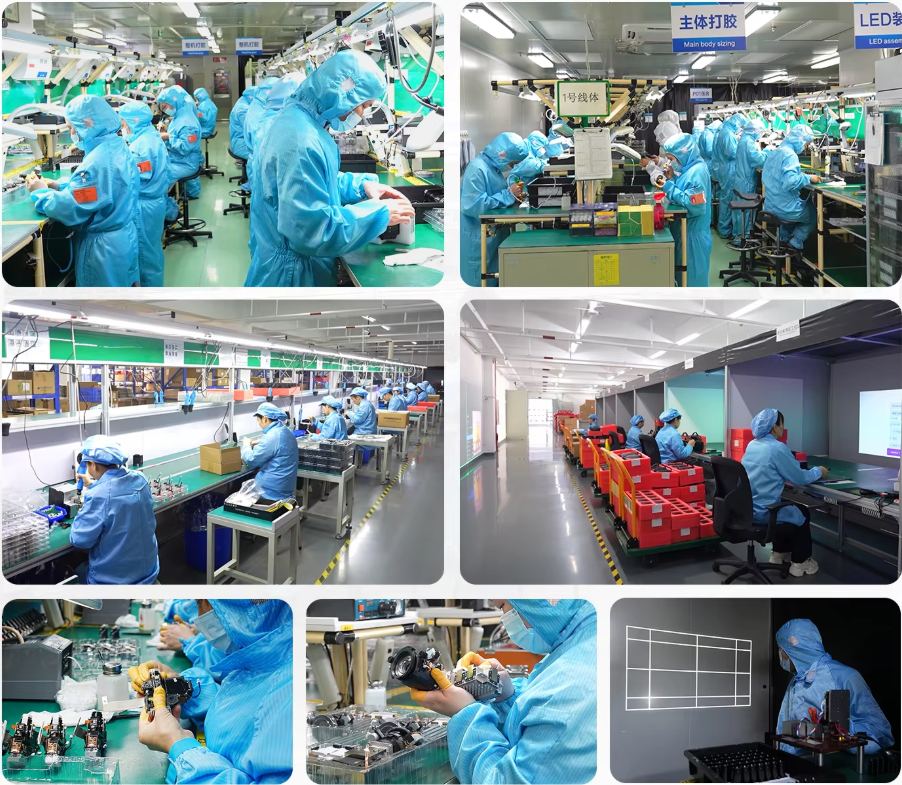
From Sample to Mass Production
The most useful evidence of a projector OEM manufacturer is not a showroom sample. It is the process used to move from a working unit to a repeatable production configuration.
Terminology and stage definitions vary by manufacturer, but a controlled OEM program should include equivalent engineering, validation, pilot-production, and mass-production approval gates.
A practical program usually begins with a product brief and technical proposal, then moves into engineering samples and validation. Once the product is close to its intended production form, the buyer and factory approve a golden sample, document the firmware and material configuration, complete required compliance planning, and run a pilot batch before full production.
The names may vary: some teams use EVT, DVT, and PVT; others use different internal labels. What matters is that every transition has an approval point, a documented configuration, and a clear owner for unresolved issues.
| Project point | What should be controlled | Why it matters |
|---|---|---|
| Engineering sample | Core functions, early optical behavior, system usability | Confirms whether the proposed platform is directionally correct |
| Validation stage | Thermal behavior, focus stability, connectivity, mechanical durability, software performance | Finds issues that do not appear in a short demonstration |
| Golden sample | Approved appearance, firmware, key components, accessories, packaging, and acceptance criteria | Creates a shared reference for production and inspection |
| Pilot production | Line setup, calibration consistency, assembly sequence, yield, and packaging | Shows whether the approved design can be repeated at scale |
| Mass production | Change control, incoming inspection, in-process QC, final inspection, shipment records | Protects consistency after the first batch |
Where Projects Usually Change
The difficult part of projector manufacturing is not making one good unit. It is making the thousandth unit behave like the approved one.
A projector can look excellent during an early sample review and still develop problems after longer use or during pilot production. Heat can change fan behavior, focus stability, wireless performance, or the behavior of a component that was not identical to the one used in the original sample.
This does not mean every projector project will fail in the same way. It means the buyer should test the final production-intent configuration rather than rely only on an early engineering unit.
| Area | What can change between sample and scale | What a buyer should document |
|---|---|---|
| Optics | Edge focus, calibration consistency, lens behavior after warm-up | Test image size, distance, focus criteria, and warm-up condition |
| Thermal design | Fan curve, surface temperature, brightness behavior, system stability | Picture mode, ambient condition, run time, and test method |
| Firmware | HDMI behavior, Wi-Fi stability, auto-focus logic, user-interface behavior | Firmware version, known issues, update process, and test devices |
| Components | Wireless module, memory, fan, lens, adapter, or storage component | Approved BOM and written approval process for substitutions |
| Packaging | Accessory protection, carton strength, cosmetic damage risk | Approved carton, drop-test scope, and final packing list |
How to Test a Projector Sample Properly
A ten-minute demo in a dark room can tell you whether the projector turns on and produces an image. It cannot tell you whether the product is ready for a U.S. launch.
The goal of sample testing is to recreate the way customers will use the product. For a portable smart projector, that may mean streaming over Wi-Fi, connecting a Bluetooth speaker, switching between HDMI devices, moving the unit, and running it long enough for the thermal system to reach normal operating behavior.
| Test area | A useful way to test it |
|---|---|
| Focus | Check center and corner focus at the intended screen size, then check again after the projector has warmed up |
| Image | Test movies, subtitles, sports, presentations, and dark scenes in the intended viewing modes |
| Noise | Run the projector long enough to reach normal operating temperature; assess fan behavior from the expected seating distance |
| HDMI | Test with the sources customers are likely to use, such as a laptop, streaming device, console, or AV receiver |
| Wireless | Test more than one router and both relevant Wi-Fi bands where supported; record the exact firmware build |
| Smart features | Test casting, Bluetooth latency, reset behavior, language settings, and OTA update process where applicable |
| Packaging | Inspect accessory fit, adapter, remote control, labeling, manual, and carton protection using the final intended pack-out |
U.S. Compliance Planning: FCC Authorization and Product Safety
A smart projector incorporating Wi-Fi or Bluetooth should be evaluated under the applicable FCC equipment authorization rules before it is imported or marketed in the United States. The required path depends on the final radio module, antenna configuration, enclosure, host integration, and overall product configuration. The FCC states that RF devices must meet applicable authorization, labeling, user-information, and related requirements before U.S. importation or marketing. FCC equipment authorization and marketing guidancefcc
The FCC uses two main equipment-authorization procedures: FCC Certification and Supplier’s Declaration of Conformity (SDoC). Intentional radiators such as Wi-Fi- or Bluetooth-enabled devices generally require Certification, while unintentional-radiator requirements may also apply to the host product. FCC equipment authorization overviewfcc
A previously certified wireless module may simplify part of the process, but it does not automatically eliminate the need to evaluate the finished host product. The importer, manufacturer, or other responsible party should work with a qualified test laboratory to determine the applicable authorization, labeling, documentation, and recordkeeping obligations for the final projector. FCC importation guidancefcc
Addressing RF compliance only after production can create redesign costs, delayed shipments, revised packaging, and restrictions on U.S. marketing.
Digital projectors fall within the broader audio/video and ICT product scope addressed by IEC 62368-1 and related U.S. product-safety standards. Whether a specific safety certification or listing is required depends on the product configuration, retailer, insurer, customer requirement, authority having jurisdiction, and sales channel. UL Solutions’ IEC 62368-1 testing and certification guidanceul
This is not legal advice. Before production is released, buyers should confirm the intended U.S. route to market with the selected testing laboratory, importer of record, and relevant retail or channel partner.
What Belongs in the Purchase Order
Many product problems are really agreement problems. The projector may work, but the buyer and supplier never agreed on which firmware version would ship, what quality standard applied, or who would pay when a change was required.
The purchase order, quality agreement, or product-development agreement should cover more than price and delivery date.
| Topic | What should be agreed |
|---|---|
| Product configuration | Model specification, drawings, approved accessories, power adapter, packaging, and firmware version |
| Golden sample | Storage, identification, revision status, and how it will be used during inspection |
| BOM freeze | Which components are critical and what written approval is required before substitutions |
| Inspection plan | Sampling standard, inspection level, defect classifications, AQL values for critical/major/minor defects, test methods, reinspection rules, and disposition of failed inspections |
| Software support | Ownership, bug-reporting process, firmware updates, OTA scope, and post-launch support responsibility |
| Warranty and RMA | Warranty period, defect definition, spare-parts plan, logistics responsibility, and reporting process |
| Tooling and IP | Tooling ownership, industrial-design rights, custom packaging, software assets, and future revision rights |
| End of life | Notice period, final-order process, and replacement-part availability |
Choosing the Right Starting Point
The best DLP projector OEM manufacturer is not necessarily the factory that sends the cheapest first quote or the most polished sample. It is the one that can explain how an approved concept becomes a stable, documented, compliant, and supportable production product.
For some buyers, that will mean beginning with a mature private-label platform. For others, it will mean investing in projector OEM customization or a deeper projector ODM development program. The sensible starting point depends on the product category, channel, expected volume, level of differentiation, and support obligation after launch.
A short product brief is enough to begin that conversation: target market, use case, retail range, expected volume, required features, customization scope, and launch timing.
MOQ depends on the platform, customization level, component sourcing, packaging, firmware work, and production plan. A branding-only private-label model may have a different MOQ from a product with a new housing, custom light engine, or modified software.
A standard existing platform can move faster than a project involving new packaging, software customization, optical changes, compliance work, or a new mechanical design. Ask the supplier to separate sample lead time, validation, pilot production, and mass-production lead time rather than giving one broad promise.
A golden sample is the mutually approved reference unit used to define the accepted production configuration. It should be linked to the correct firmware version, approved materials, accessories, labeling, packaging, and inspection criteria.
Components sometimes need to change because of availability, cost, or end-of-life issues. The important point is that the agreement should define which changes require written buyer approval, how alternatives will be tested, and how the approved BOM revision will be updated.
That depends on the project agreement and on what is actually customized. The buyer should define ownership, access rights, source-code expectations where relevant, update responsibility, and what happens if the manufacturing relationship ends.
Not necessarily. The final projector still needs an assessment based on the radio module, antenna, host integration, enclosure, and applicable intentional- and unintentional-radiator rules. The final answer should come from the test laboratory and responsible compliance party. FCC equipment authorization overviewfcc
A useful OEM quotation should identify the proposed platform, DLP configuration, resolution, brightness target, light source, included accessories, firmware assumptions, packaging, MOQ, lead time, payment terms, warranty scope, customization items, and any tooling or development charges.
Agree on the warranty period, defect-reporting process, spare-parts list, repair or replacement responsibilities, shipping allocation, and the expected availability of key parts. The answer should match the buyer’s support model, whether that is direct-to-consumer, distributor-led, or retail service.